
Prepare the account before the alert
Prepare access to the execution dashboard, the intended Tradovate account and a TradingView alert that can send a webhook. A Live brokerage account, a simulated evaluation account and a Demo profile can have different connection permissions. Start with the exact account you are allowed to test.
Enable two-factor authentication in TradingView. Check the webhook feature in your plan, identify the contract you intend to trade, and decide whether the strategy or the execution workflow will manage exits. These decisions prevent a successful login from becoming a mistaken trade.
1. Create your TradingView execution route
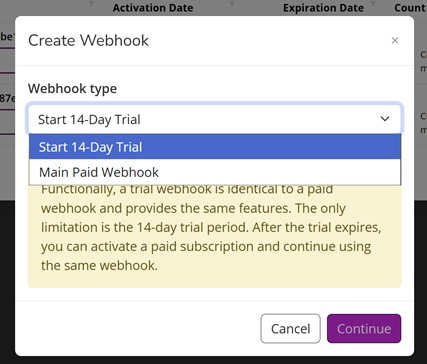
Create your automation account, then open Trade Webhooks. Choose the trial or paid webhook option available in the dashboard. Select TradingView as the source and the Tradovate connection as the destination.
The webhook records the destination and account connection. Its URL is the address your TradingView alerts will use. You do not need a separate route for every symbol on the same account.
2. Keep the two connection methods distinct
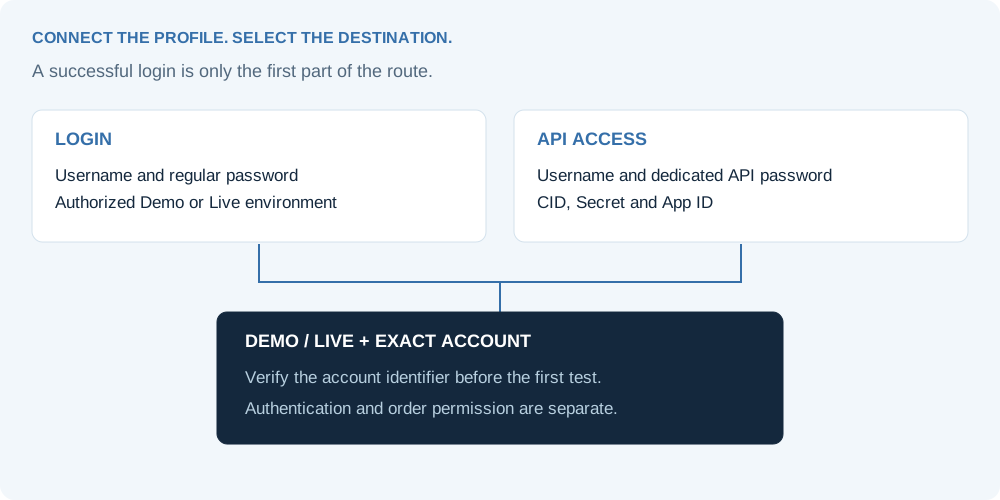
The connection form offers Tradovate Login and API Access with different credential fields. Choose the method authorized for your account. A regular login and a dedicated API connection have separate permissions and eligibility requirements.
| Method | Credentials required by the connection form | What to confirm |
|---|---|---|
| Tradovate Login | Tradovate username and password; Demo or Live; account selection | The regular login belongs to the intended profile and the chosen environment exposes your account. |
| Tradovate API Access | Tradovate username, dedicated API password, CID / API Key ID, API Secret and App ID / API Key Name | The API credentials are valid for this connection and have the required order permissions. |
Retail API-key eligibility
Tradovate’s published retail API guide lists a Live account holding more than $1,000, a completed CME Information License Agreement and the API Access add-on before generating a personal key. Confirm these requirements and the current charge with Tradovate. They describe the personal API-key path; do not assume every third-party Login path uses the same fee or eligibility model.
Tradovate’s authentication guide explains API keys, dedicated passwords and OAuth as separate authorization patterns. A Login form should not be described as OAuth without evidence of that authorization flow.
3. Select the environment and the exact account
Use Demo for an authorized simulated test and Live for the matching live connection. The environment must match the account you expect to trade. A login that succeeds in Demo does not prove that a Live account can submit orders.
When a profile exposes several accounts, supply the exact account identifier requested by the connection form. Read it from Tradovate’s account selector or account list. Your username identifies the profile; the account identifier selects the destination. Check the resulting account after authorization.
4. Review symbol mapping and whole-contract size
Choose the tradable instrument available in the selected account. TradingView may send a continuous symbol such as MES1!; the execution route must resolve or map it to the intended expiry. Read the destination contract in the order history during testing.
Keep the first size at one whole contract when permitted. Check the saved quantity multiplier and any per-route sizing setting. A signal containing 1 should result in the contract exposure you intended, not an unreviewed multiplier or a decimal lot quantity.
5. Add the URL and message to TradingView
Create an alert for the correct indicator condition or strategy event. In the execution dashboard, click the shortened Webhook UUID to copy the full route URL. Paste that address into Notifications >> Webhook URL.
Use the Message field for the JSON. For an indicator, start with one explicit action and fixed whole-contract size. For a strategy, match its order-fill or custom-message setup. A strategy’s server copy must be recreated after changing its script inputs or chart context.
{"ticker":"MES1!","order_action":"buy","order_contracts":1,"order_type":"market"}The symbol requires verified expiry resolution. This example contains no stop or target; it is a format example for a deliberately monitored Demo test.
Open the JSON builder6. Verify the entry, protection and close
Wait for the connection result before sending an instruction. Webhook Logs >> Test Webhook exercises the execution route; an accepted test can place an actual order. Select a permitted Demo account explicitly before using it.
- The intended account and environment are selected.
- The contract, side and whole-number size match the test.
- The webhook log records the request and its processing result.
- Tradovate displays the resulting order and any fill.
- Any requested stop and target exist with the intended quantity.
- The close test behaves as intended, with no stray working orders.
Record a failed test before repeating it. Check the account state first: resending an entry merely because its response is unclear can add exposure.
Diagnose a failed connection or order